The Headless Checkout SDK renders different UI elements depending on the type of payment method selected. This page
provides a visual overview of each element type, when it appears, and how to integrate it.
For a decision flowchart,
see How should I render elements?.
Payment Method Icons
Every payment method exposes an iconUrl property — an absolute URL pointing to an SVG icon hosted on the Purse CDN.
The URL is environment-aware (sandbox vs production) and reflects the official brand guidelines of the payment partner.
You can use it directly in an <img> tag when building your payment method list.
const methods = checkout.paymentMethods.value;

methods.forEach((method) => {
    const item = document.createElement('li');
    item.innerHTML = `<img src="${method.iconUrl}" alt="${method.method}" width="40" height="24" /> ${method.method}`;
    document.getElementById('payment-list').appendChild(item);
});
Card Vault Elements
When a card-based vault method is selected (credit or debit card stored via Purse tokenization), the SDK provides two
rendering options depending on how much control you need over the UI.
The Hosted Form is a pre-built, PCI-compliant card form injected as a single iframe. It covers all card fields —
card number, expiry date, and CVV — and supports light styling via
a theme object.
Use this when you want a quick integration with basic branding customization.
Hosted Form — card number, expiry date, CVV, and cardholder name rendered in a single iframe injected into your
page
const paymentElement = method.getPaymentElement({
    theme: {
        global: {fontFamily: 'Inter', fontSize: '14px'},
        input: {
            borderRadius: '8px',
            borderColor: '#ccc',
            backgroundColor: '#fff',
        },
    },
    translations: {
        cardNumber: {placeholder: 'Card number'},
        expiryDate: {placeholder: 'MM/YY'},
        cvv: {placeholder: 'CVV'},
    },
});

paymentElement.appendTo(document.getElementById('card-container'));
→ Customization guide
Hosted Fields
Hosted Fields injects each card field as a separate, individually-targetable iframe. This gives you complete layout
control — you can place card number, expiry, CVV, and cardholder name anywhere in your own form structure.
Use this when you need pixel-perfect design or a fully custom form layout.
Here are some examples of the Hosted field with different theme customizations:
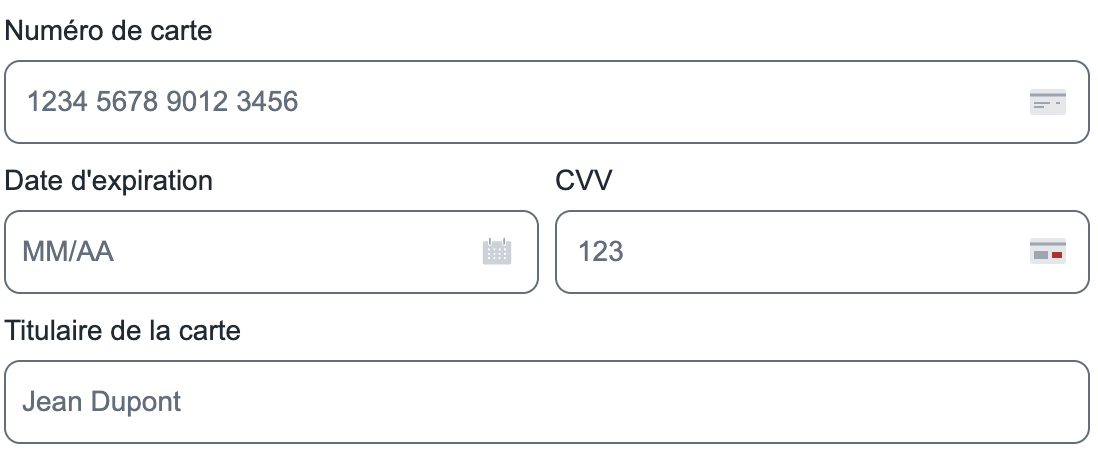
Hosted Fields in a grid layout — card number full-width, expiry and CVV side by side, cardholder name below
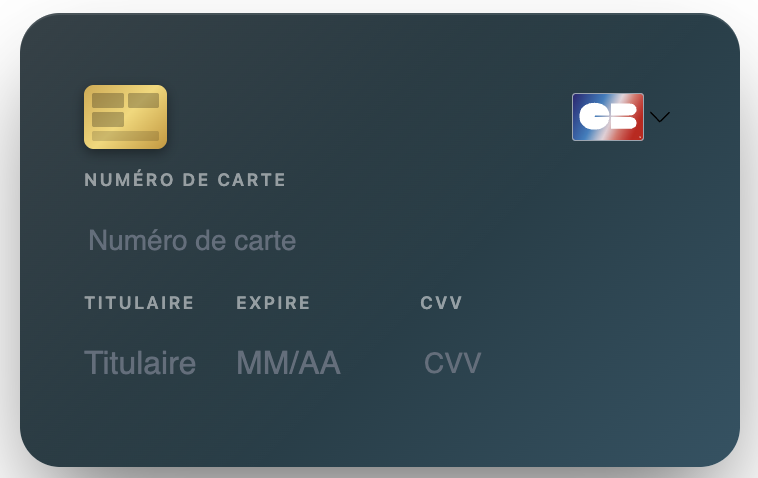
Hosted Fields embedded into a credit card-shaped UI — an intentionally over-the-top example of what's possible
when you control every pixel of the layout

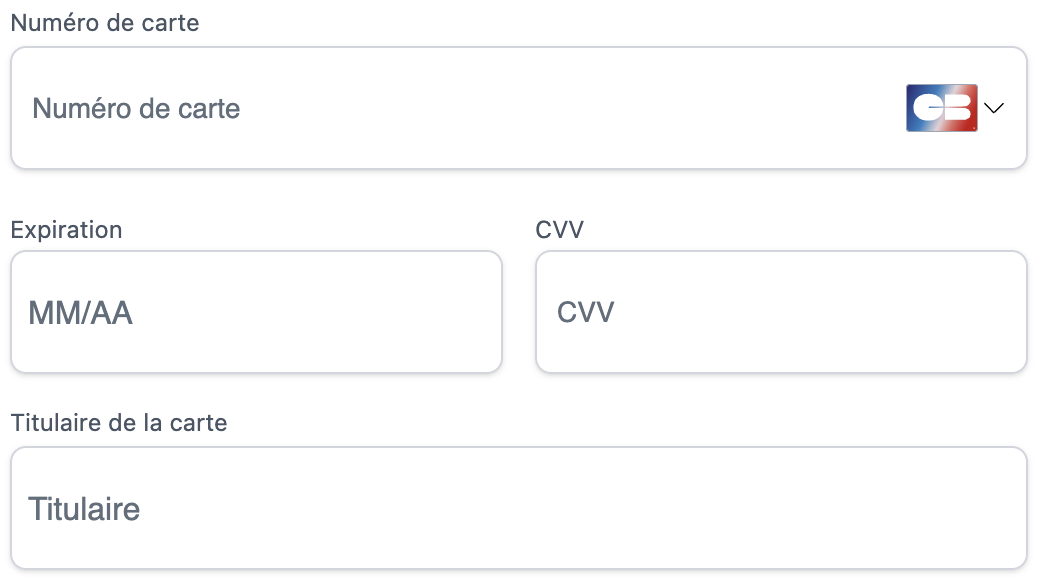
Hosted Fields in a compact single-line layout — all four fields on one row
const hostedFields = method.getHostedFields({
    theme: {
        global: {fontFamily: 'Inter'},
        input: {borderRadius: '4px', borderColor: '#e0e0e0'},
    },
});

hostedFields.render({
    cardNumber: '#field-card-number',
    holderName: '#field-holder-name',
    expDate: '#field-expiry',
    cvv: '#field-cvv',
});
<div id="card-container">
    <div id="field-card-number"></div>
    <div id="field-holder-name"></div>
    <div id="field-expiry"></div>
    <div id="field-cvv"></div>
</div>
→ Hosted Fields guide
- Hosted Form → fastest to integrate, sufficient for most use cases
- Hosted Fields → choose when you need full layout control or a fully custom design system
PSP Fallbacks (non-vault)
In rare cases, a PSP may not support Purse's direct vault flow and will instead inject its own form UI via the payment
element. This is PSP-dependent and should occur infrequently.
When it happens, getPaymentElement() still renders correctly — the PSP's iframe is mounted in your container. No
special handling is required on your side, but the visual result will reflect the PSP's own styling rather than your
theme.
PSP fallback UIs cannot be styled with the Purse theme object. Contact the Purse Integration Team if this is a concern for your integration.
xPay buttons (Apple Pay, Google Pay, PayPal) are rendered by the partner SDK directly. The Headless Checkout SDK
mounts a container for the partner to inject its own button — you do not build the button UI yourself.

xPay buttons rendered natively by each partner SDK
const applePayMethod = checkout.paymentMethods.value
    .find((m) => m.method === 'applepay');

const paymentElement = applePayMethod.getPaymentElement({
    xPayButton: {
        buttonColor: 'black',
        buttonType: 'buy',
    },
});

paymentElement.appendTo(document.getElementById('xpay-container'));
Always follow each partner's official UI guidelines (button placement, sizing, branding). Avoid mixing xPay buttons with standard card fields in the same visual group.
→ Digital Wallets guide
Redirections
Some payment methods send the customer to a PSP-hosted page to complete payment (e.g., 3DS authentication pages,
bank selection flows, or PSP-hosted checkout). In this case, the SDK handles the redirect internally — your role is to
inform the user before it happens.
const redirectMethod = checkout.paymentMethods.value
.find((m) => m.method === 'bancontact');
const paymentElement = redirectMethod.getPaymentElement();
paymentElement.appendTo(document.getElementById('redirect-container'));
document.getElementById('redirect-info').textContent =
'You will be redirected to complete your payment securely.';
Always display a clear message before triggering a redirect. This reduces drop-off and confusion. The redirect is initiated when the customer submits the payment.
→ Getting Started
Secondary Methods
Secondary methods (gift cards, loyalty cards, vouchers) are applied on top of the primary payment method to cover
part of the order total. Multiple secondary methods can be active at once.
Unlike primary methods, secondary methods do not use getPaymentElement(). Instead, you retrieve a token directly using
the card's PAN and optional CVV, then add it to the payment split.
const giftCardMethod = checkout.paymentMethods.value
.find((m) => m.isSecondary);
const requiresCVV = giftCardMethod.requiresCVV(panValue);
const token = await giftCardMethod.getSecondaryToken(
panValue,
requiresCVV ? cvvValue : undefined
);
await token.take();
Customers can add several secondary tokens in a single transaction (e.g., two gift cards + loyalty points). Each token is added independently to the split.
→ Gift Cards guide
How should I render elements?
The integration approach depends on the payment element type and your customization needs:
Quick Reference:
- Secondary payments (Gift Cards, Loyalty): Use
getSecondaryToken() and take() method to add to split → Gift Cards Guide
- Redirection: Use
getPaymentElement() and show a message informing the user they'll be redirected → Getting Started
- Vault/Card with light customization: Use
getPaymentElement() → Setup Primaries
- Vault/Card with full customization: Use
getHostedFields() → Hosted Fields Guide
- X-Pay (Apple Pay, Google Pay, PayPal): Use
getPaymentElement() - partner UI will render automatically → Digital Wallets Guide
- Other partner methods (Alma, Klarna...): Use
getPaymentElement() - partner UI will render automatically → Installments Guide
Shortcut: checkout.getPaymentElement()
When you already know which partner (and optionally method) you want to render, you can skip the paymentMethods → find → getPaymentElement dance and call getPaymentElement() directly on the checkout instance:
const el = checkout.getPaymentElement({
partner: 'ingenico',
method: 'creditcard',
hostedForm: { },
theme: { },
});
el.appendTo('#card-container');
const fields = checkout.getPaymentElement({
partner: 'ingenico',
hostedFields: { },
theme: { },
});
Behaviour:
hostedForm and hostedFields are mutually exclusive — passing both falls back to hostedForm and emits a console warning.method is required for hostedForm; for hostedFields it can be omitted, in which case the first compatible vault method on partner is picked.- If no method matches, the call throws
PurseHeadlessCheckoutError with code PAYMENT_METHOD_NOT_FOUND.